 Strength Well


The first time I tried a bird dog row on a bench, I lasted three reps before tipping toward the weight and grabbing the bench like it owed me money. I'd been rowing for years… it didn't matter one bit.
That's exactly why I love it. A bird dog row is a single-arm row done from a bird dog position: one knee and the opposite hand on a bench, the other leg stretched out behind you. It trains your upper back, core and glutes together while your spine stays still and supported.
It looks simple. It isn't... but there's a clear way in. Below you'll find how to do it, the 4-step ladder I use to get clients from the floor to the full loaded version, and the weights to start with.
What Is a Bird Dog Row?
Think of it as two exercises you may already know, stacked together. The bird dog is the classic all-fours move where you stretch out one arm and the opposite leg. The single-arm row is a back exercise where you pull a weight up toward your hip.
On a bench, you've only got two points of contact: one knee and one hand. So every time you pull, your body wants to twist toward the weight, and your core has to stop it.
Here's the clever bit. Yank the weight, shrug or let your hips swing open, and you'll wobble straight away. A normal row lets you get away with all of that. This one doesn't, so it works like a built-in form check (a slightly humbling one).
The weight stays light, the payoff is big, and your back stays neutral and supported the whole time.
Muscles Worked
A bird dog row splits the work across three jobs:
- Pulling the weight: lats (the big muscles down the sides of your back), rhomboids and middle traps (between your shoulder blades), rear shoulders and biceps.
- Holding your body still: deep abdominal muscles, obliques, and the small muscles that run along your spine, including the multifidus and spinal erectors.
- Holding the leg up: glutes and hamstrings.
Your support arm and shoulder pitch in too.
The bird dog part has a long history in back rehab. Spine researcher Stuart McGill has studied it as a spine-stabilizing exercise, and it switches on the glutes and deep back muscles with nothing more than body weight. Add the row and your upper back joins the party.
My clients often tell me they feel their glute and upper back working in a way a normal row never gave them. That's the leg and the core finally doing their share.
Why Your Upper Back Deserves the Attention After 45
Most of my midlife clients have never trained their upper back directly. Squats, yes. A bit of core work, maybe. Something that pulls? Rarely. And then they notice the rounded "desk posture" creeping in.
Muscle doesn't wait for us to get around to it. Muscle mass drops by roughly 3% to 8% per decade from age 30, and around menopause lean mass falls by about 0.5% a year, according to a 2022 review of sarcopenia in menopausal women. Your back muscles are part of that.
A strong back matters for your spine, too. In a 10-year follow-up of postmenopausal women, those who did back-strengthening exercise for two years still had stronger backs than the non-exercise group 8 years later. They also had fewer vertebral fractures: 1.6% of vertebrae compared with 4.3% in the group that didn't exercise.
(That study used back extension exercises, not bird dog rows, so I won't claim this one move prevents fractures. But it's a pretty good argument for building a strong back).
The CDC recommends muscle-strengthening work at least 2 days a week for all major muscle groups, back included. The bird dog row covers back, core and glutes in one go. This is real strength training, not a stretch with a weight nearby.
How to Do a Bird Dog Row (Step by Step)
You need a flat bench and one weight: a kettlebell, dumbbell or weight plate. Here's the right-arm version.

- Set up. Put the weight on the floor beside the bench, on your right. Kneel with your right knee on the bench, shin near the end. Place your left hand on the bench under your left shoulder, with a slight bend in the elbow.
- Pick up the weight in your right hand. The weight goes in the hand on the same side as the knee on the bench. This is the bit almost everyone mixes up at first.
- Extend your left leg straight back to hip height, toes pointing down. You want a flat line from your head to your heel. Look down at the bench.
- Brace and row. Breathe out and pull the weight up toward your lower ribs and hip, elbow close to your side, shoulder blade drawing back. Stop when your elbow is about level with your body.
- Pause and lower. Hold for 1 to 2 seconds at the top, then lower over 2 to 3 seconds until your arm is straight, without letting the shoulder drop toward the floor.
- Swap sides once you've done all your reps.
Form Cues That Make It Click
- Belt buckle facing the floor. Keeps your hips square instead of opening toward the weight.
- Long neck, eyes on the bench. No checking yourself out in the mirror mid-rep.
- Elbow to your back pocket. Pull toward your hip, not straight up to your armpit.
- Leg no higher than your hip. Any higher and your lower back starts to arch.
- Slow on the way down. The lowering is where most of the control comes from.
Tip: Film yourself from the side, or ask someone to rest a broom handle along your back. Your head, upper back and tailbone should all touch it.
The Bird Dog Row Progression: 4 Steps From Floor to Bench
If the full version feels wobbly, don't force it. I take clients through these four steps, and I tell every one of them the same thing: there's no shame in staying on a step for a few weeks. Each one is a proper exercise in its own right.
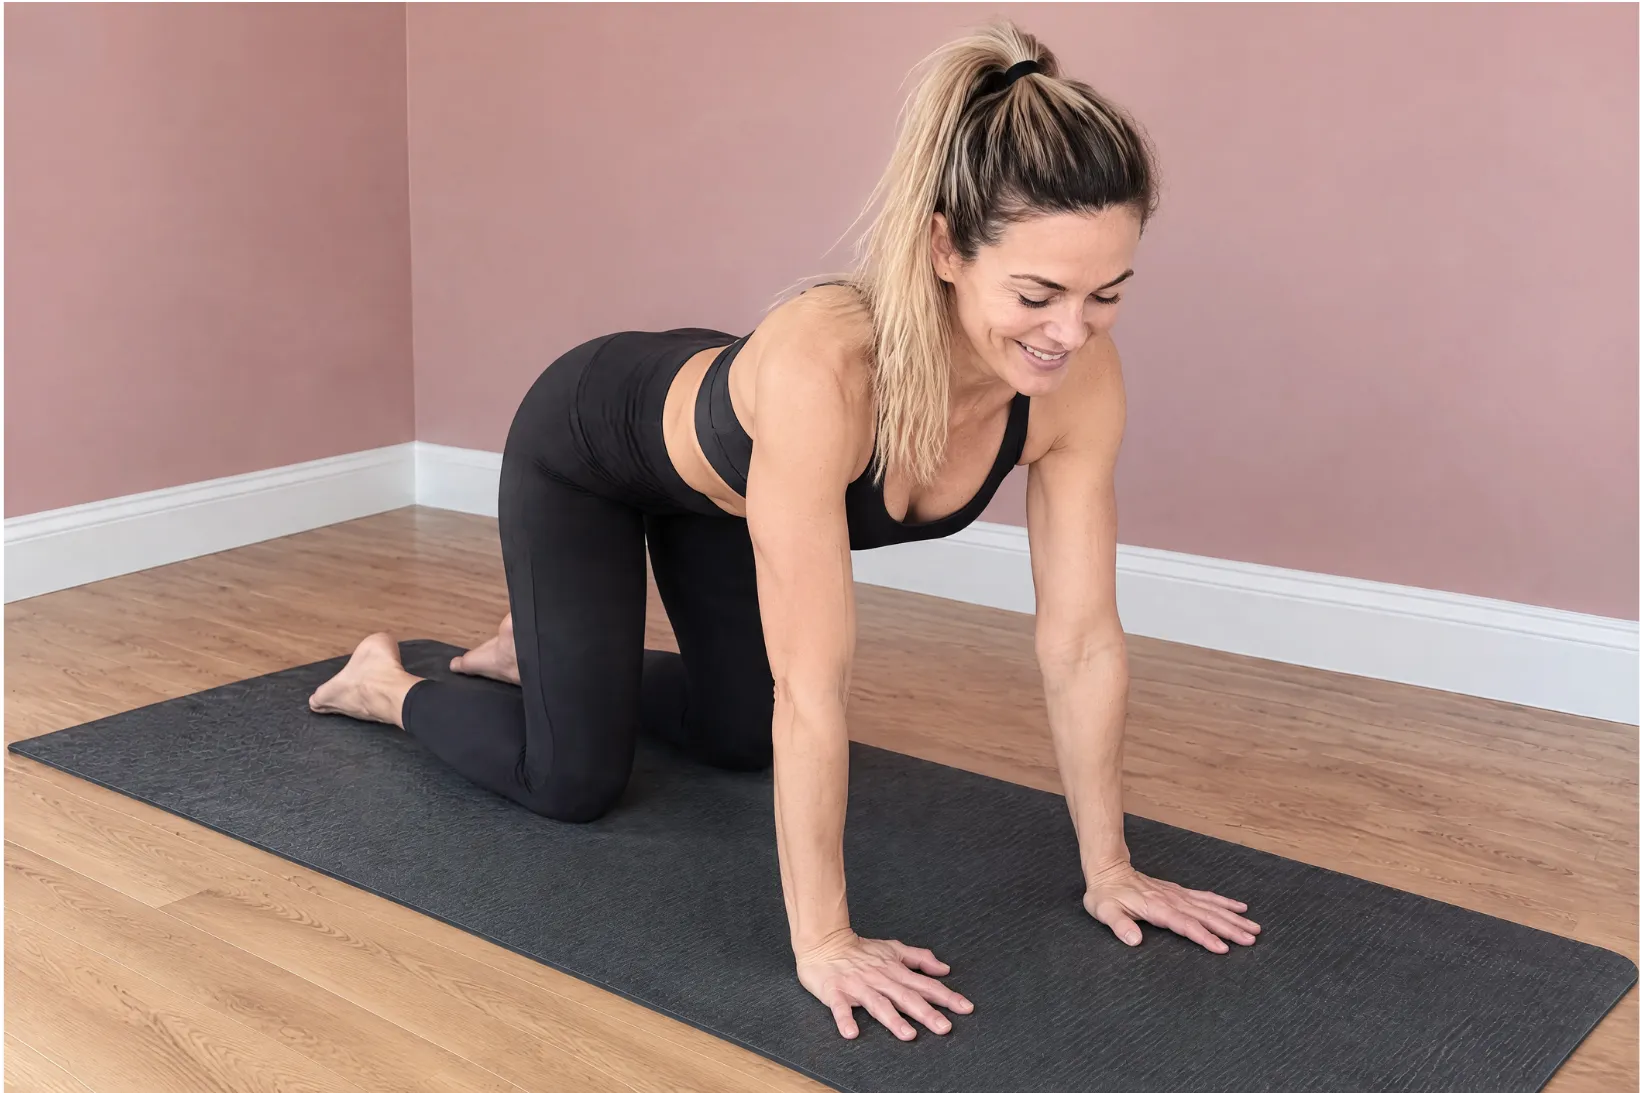
Step 1: Leg Lift From All Fours
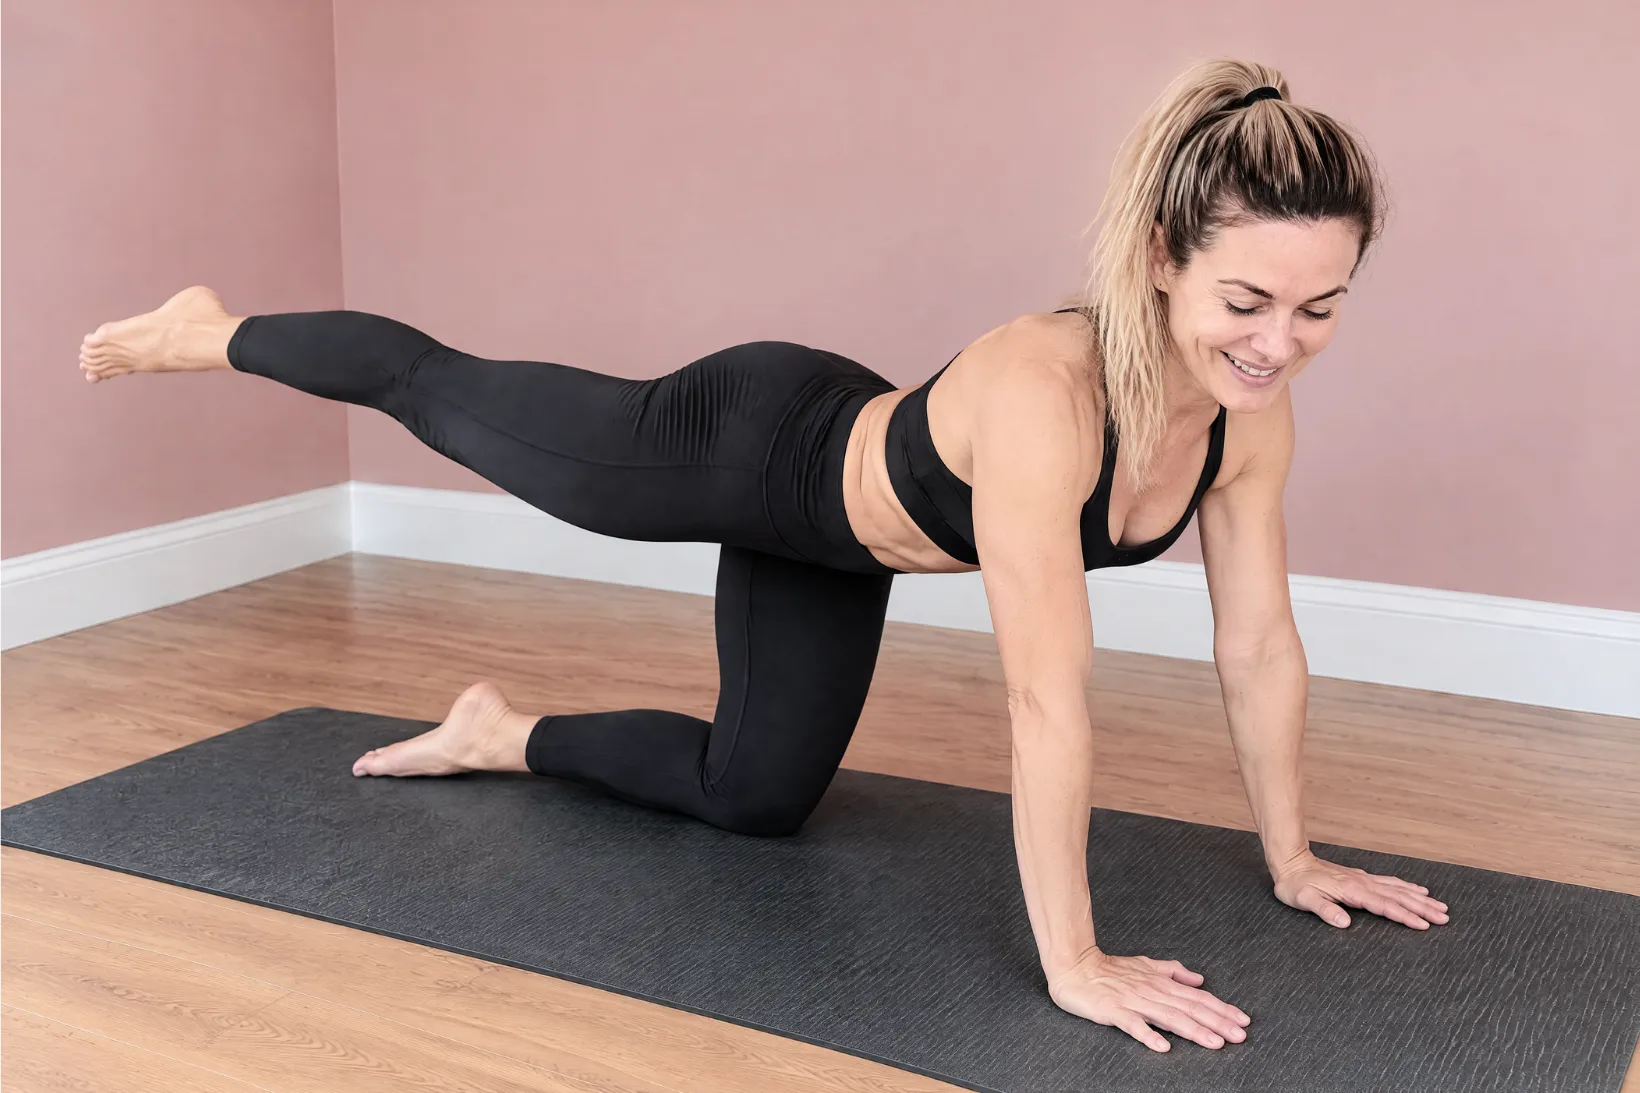
Kneel on the floor on all fours, hands under your shoulders and knees under your hips. Slide one leg back and lift it until it's level with your hip. Keep both hips level, as if a glass of water were balanced on your lower back. Hold for 3 to 5 seconds, then lower.
Do 2 to 3 sets of 6 to 8 per side.
Move on when you can do 8 slow reps on each side with no hip tilt and no sag in your lower back.
Step 2: Bird Dog on the Floor
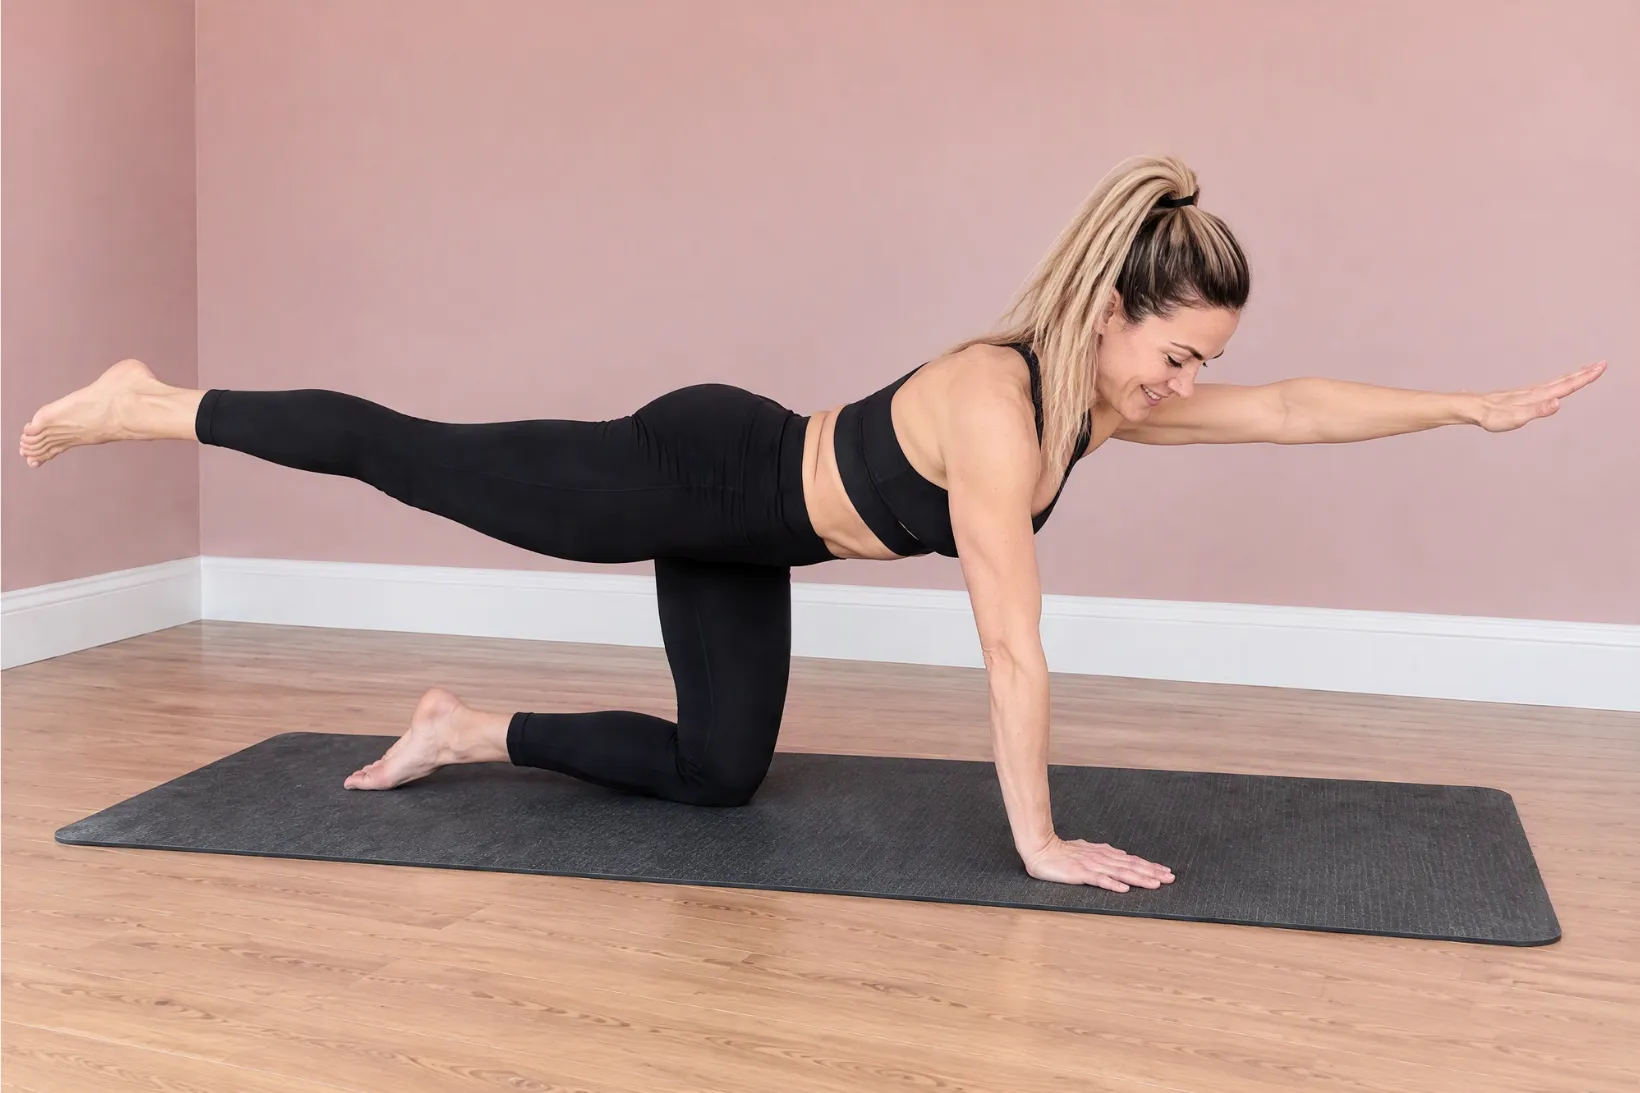
Now reach the opposite arm forward at the same time, so your arm and leg end up roughly parallel to the floor. Hold for 3 to 5 seconds, return, and switch sides. The Harvard Health guide to the bird dog suggests starting with only an arm or only a leg if the full move is too much, which is exactly what Step 1 does.
Do 2 to 3 sets of 8 to 10 per side.
Move on when you can hold every rep for 5 seconds without wobbling.
Step 3: Bird Dog on a Bench
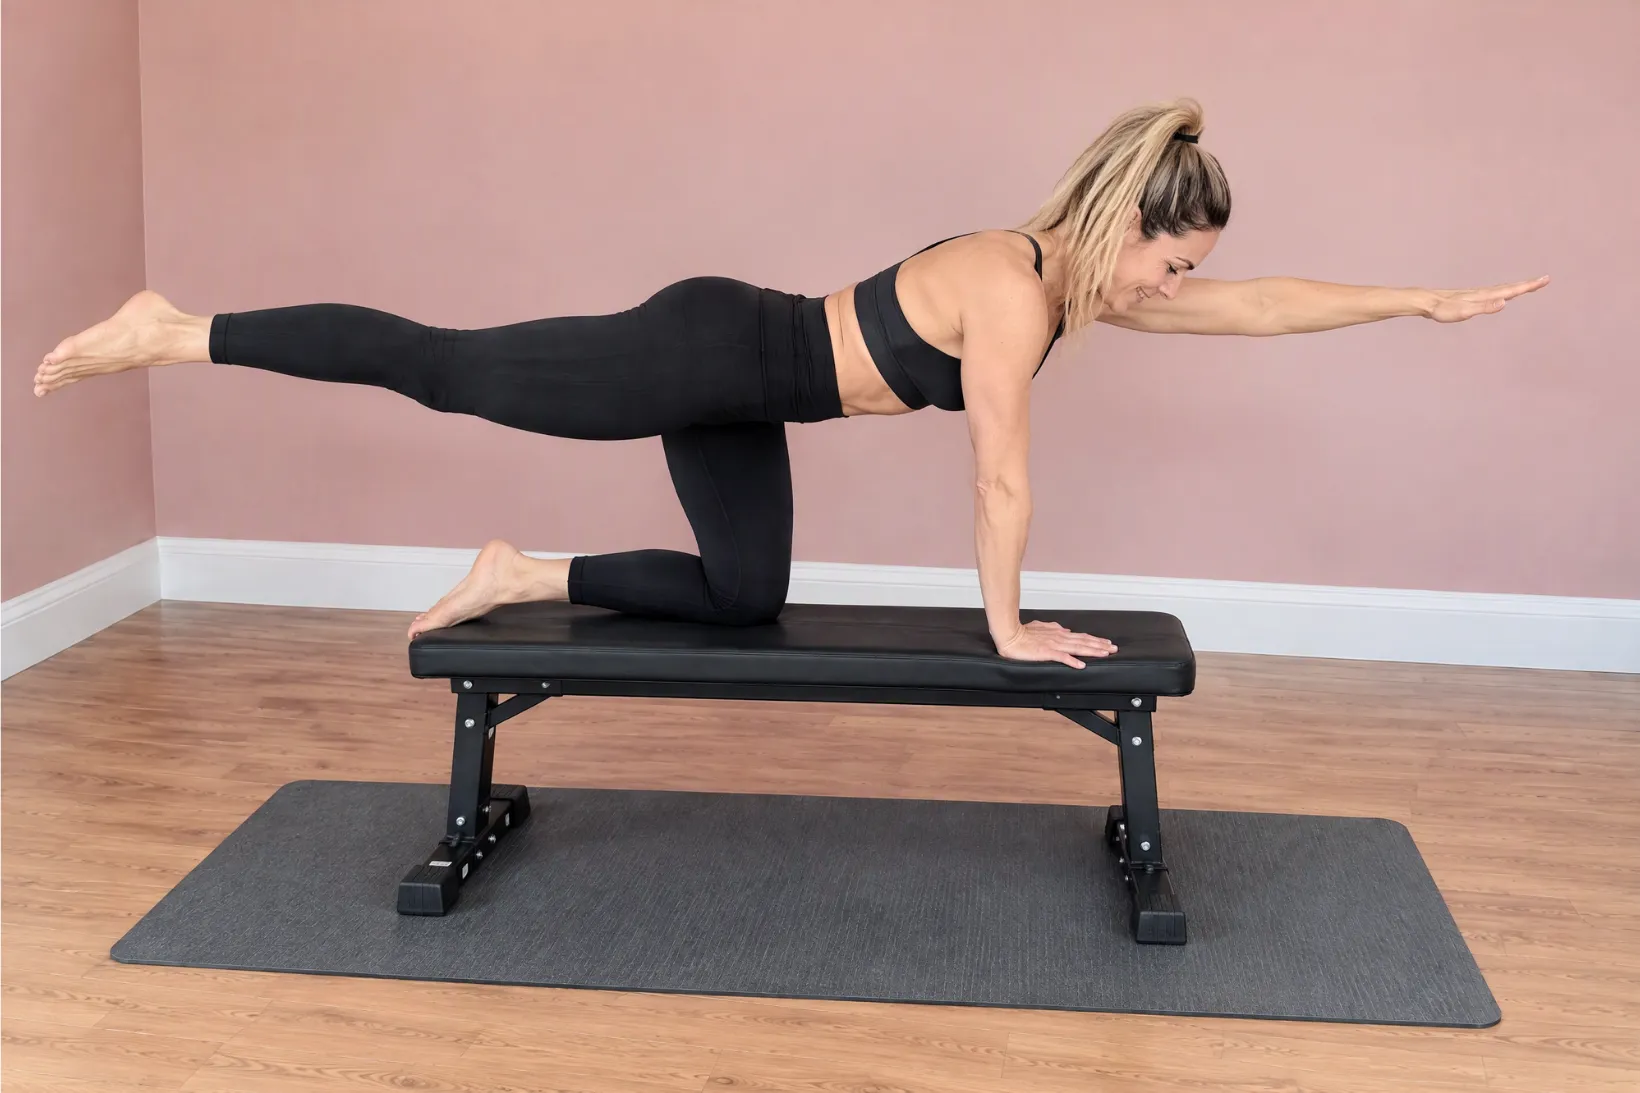
Get into the bird dog row setup on the bench: one knee and the opposite hand down, free leg stretched out behind, free arm hanging with no weight. The narrower base is the whole challenge here.
Hold for 10 to 20 seconds per side, for 2 to 3 rounds. Once that feels steady, try a few "rows" with an empty hand, keeping your hips still.
Move on when you can hold for 20 to 30 seconds per side without your hips twisting or your leg dropping.
Step 4: Bird Dog Row With a Weight
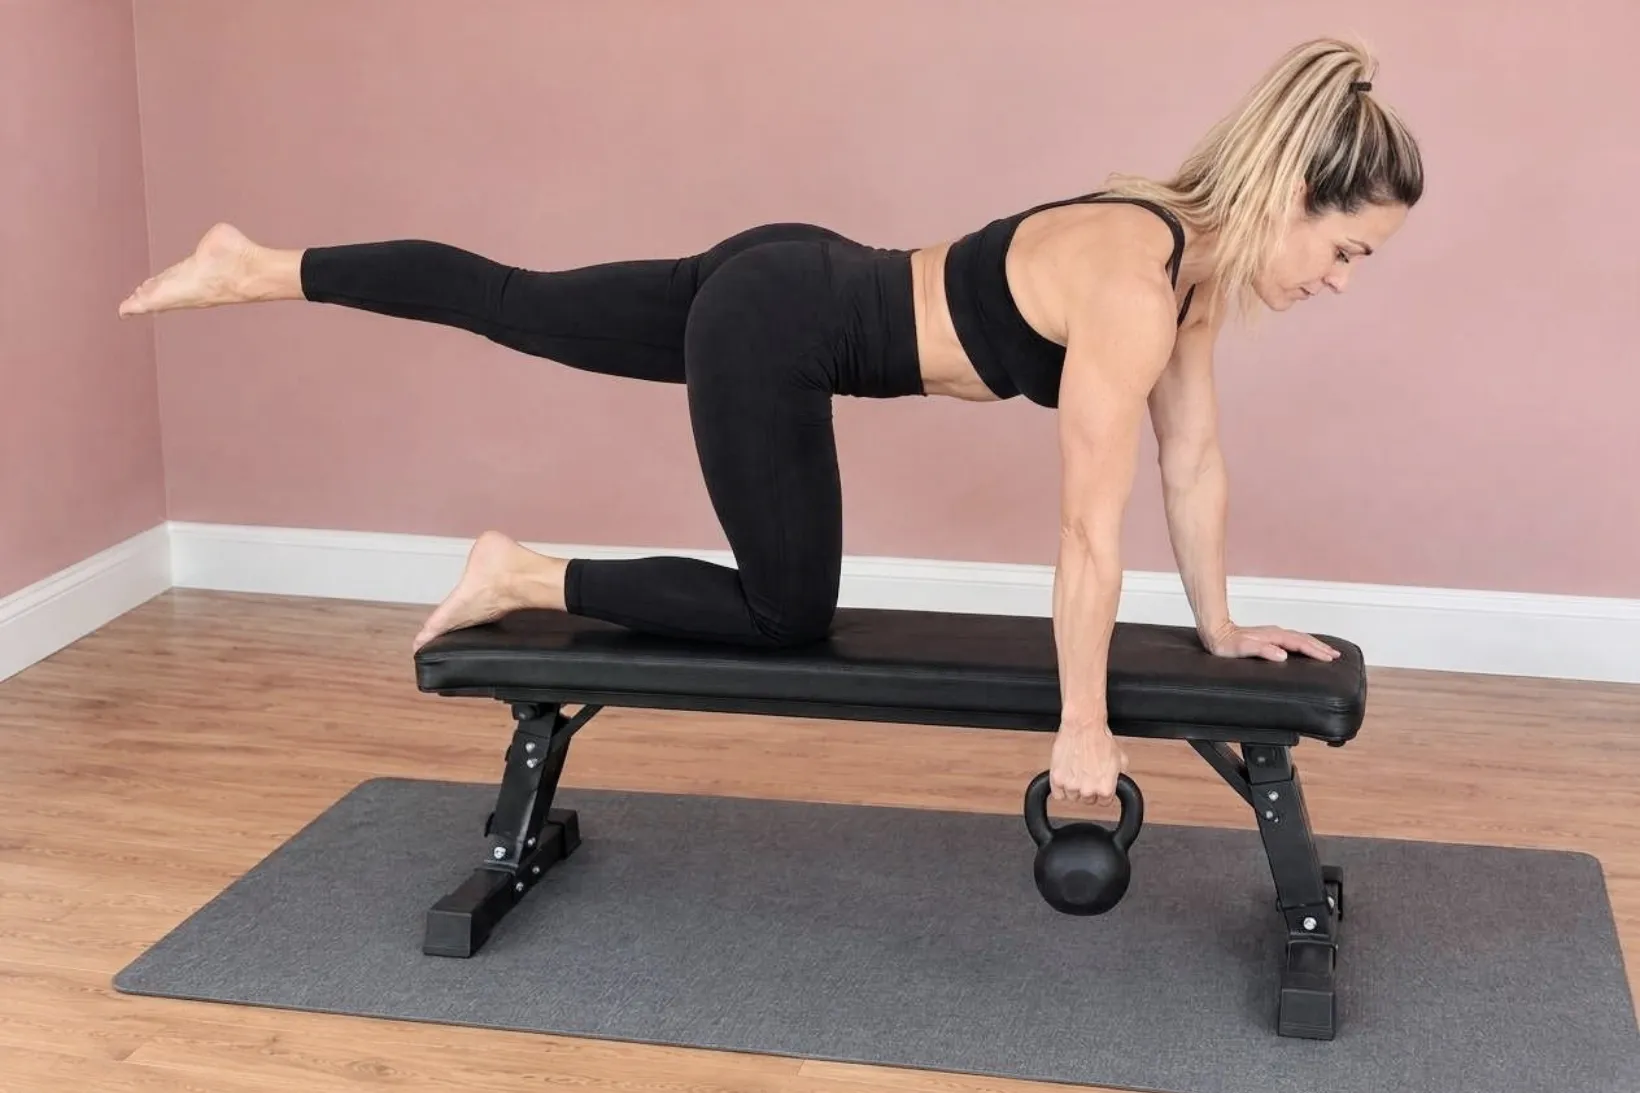
Now for the fun part. Any of these will do the job:
- Kettlebell: my usual first choice. The weight sits low and doesn't knock the bench.
- Weight plate: hold it by the rim. It stays close to the bench and is easy for beginners to control.
- Dumbbell: works fine, but the end can bump the bench or your thigh.
No bench? You can row from the floor bird dog position instead. The weight touches down sooner, so the range is shorter, but it still does the job.
| Step | Sets | Reps or hold | Ready to move on when |
|---|---|---|---|
| 1. Leg lift | 2 to 3 | 6 to 8 per side, 3 to 5 sec hold | 8 slow reps, hips level |
| 2. Floor bird dog | 2 to 3 | 8 to 10 per side, 3 to 5 sec hold | 5 sec holds, no wobble |
| 3. Bench bird dog | 2 to 3 | 10 to 20 sec hold per side | 20 to 30 sec, steady |
| 4. Bird dog row | 2 to 3 | 8 to 12 per side | 12 clean reps, two sessions in a row |
How Much Weight, How Many Reps
Lighter than you think. Most women new to this start at 5 to 10 lb (2 to 4.5 kg), which is roughly half to two-thirds of what you'd use for a normal one-arm row. I regularly see clients who row 20 lb (9 kg) find 10 lb (4.5 kg) plenty here (don't worry, your ego will survive).
- Sets and reps: 2 to 3 sets of 8 to 12 per side
- Tempo: about 1 second up, a 1 to 2 second pause, 2 to 3 seconds down
- Rest: 60 to 90 seconds between sets
- How often: 2 to 3 times a week, with a rest day in between
When you can do 12 clean reps on every set for two sessions in a row, go up by the smallest jump you have, usually 2.5 to 5 lb (1 to 2 kg).
If your hips twist, your leg drops, you start jerking the weight or your shoulder creeps toward your ear, it's too heavy. This is a move for clean reps, not big numbers.
Common Mistakes (and Quick Fixes)
The mistake I see most often? Going too heavy, which causes most of the others on this list.
- Hips twisting open toward the weight. Go lighter and think "belt buckle to the floor".
- Leg too high, lower back arching. Bring the leg down to hip height.
- Shrugging. Keep your shoulder away from your ear and lead with the elbow.
- Yanking the weight. Slow down. Pause at the top and lower over 2 to 3 seconds.
- Holding your breath. Breathe out as you pull, in as you lower.
- Locking the support elbow. Keep a soft bend in it.
Joint-Friendly Adjustments
Knees, wrists and shoulders all get a say in this one. Here's how to keep them happy.
- Knees: a hard bench isn't kind to knees. I fold a mat or towel under the kneeling knee as standard. If kneeling hurts at all, switch to a standing single-arm row with one hand on the bench.
- Wrists: grip the edge of the bench, make a fist, or rest your support hand on a dumbbell handle to keep the wrist straight.
- Shoulders: shorten the row and keep the weight light. Stop the pull lower if you feel any pinching at the front of the shoulder.
- Lower back: lower the leg, or go back a step. The floor bird dog is a perfectly good exercise on its own.
- Balance worries: start on the floor, and when you move to the bench, set it next to a wall.
If you have osteoporosis, a recent spinal fracture, a diagnosed back condition, a recent shoulder injury or surgery, or knee or wrist pain that doesn't settle with these changes, check with your doctor or physical therapist first. If you have balance problems or dizziness, stay on the floor version and check with your doctor.
Where to Put It in Your Week
The bird dog row is pretty flexible. Use it as your main back exercise in a full-body session (after squats or deadlifts), as a warm-up of one or two light sets before heavier rows, or as a finisher.
Pair it with a push, like a push-up or dumbbell press, and do it two to three times a week.
As for results, I'll be straight with you. You won't stand taller after one session. But most of my clients feel noticeably steadier within 2 to 4 sessions, and moving up a step every 2 to 3 weeks is typical. With consistent training, your back strength builds noticeably over 6 to 12 weeks.
Several clients have told me they stand taller after a few weeks of regular back work. That's the kind of result that shows up everywhere, not just in the gym.
Find your step on the ladder, and start climbing.